I'm not even one of the people who are like 'I should blog more', because I don't feel an obligation.
But I keep thinking maybe I'll do some fashion posts? They seem fun.
I'm not abandoning forever though because when I am an adult I will be a mix of Naomi Davis and Hailey Devine.
I've started a habit neither good nor bad of writing on receipts. The paper is so great and I cannot help but find a sharpie and scribble down some song lyrics or my last tweet or an abstract spanish phrase. I'm so visual and I have this innate desire to attach some tangibility to my thoughts, emotions, memories. It helps a lot.
45 days until Mexico. 152 days until Tonga. NYC will be a few months after that and hopefully Europe after that. It's worth everything.

Wednesday, February 5, 2014

Thursday, December 19, 2013




Wednesday, December 18, 2013
On the topic of eyewear

Yes, that's me with an empanada. The important thing to notice is the awesome hot pink and tortoiseshell of my glasses.
Guys, I love eyewear. Especially now that the really smart-looking ones are in style. You will never find truer magic than when a boy puts on a pair of really smart-looking glasses. It's wonderful. However, I don't wear my glasses entirely often, because of a fact I don't always like to admit. It's been a source of great heartache to me. Long story short, one of my eyebrows is higher than the other one.
I know, awkward right?
I've learned to accept this trial though, and does it dampen my love of the appearance of nerd through eyeglasses? No.
I was in Utah this past weekend when I noticed my cousin wearing the cutest new pair of prescription eyeglasses. And she got them online! (If you're anything like me, you love online shopping, because it's not socially acceptable to wear pajamas and eat oreos while shopping at the mall.) If you're interested, I recommend you check out GlassesUSA.com.
For your reading pleasure I've grabbed a few of my favorite styles, all available on their website.


So what do you think? Leave a comment on which style's your favorite and which just doesn't jive with you. And if you do decide to order glasses, make sure to stop by GlassesUSA and use one of these exclusive promo codes!
-Take 15% off + get free shipping on your entire order (orders over $50). Code: FS15
-Take 10% off any order of prescription glasses. Code: Blog10
Sunday, December 8, 2013
The most wonderful time of the year
Is it bad that I started out the holiday season by perusing the websites of forever21 and urbanog and buying things for myself? Because I definitely did.
So basically all I have to tell you guys today is that Junior Year is hard. It is a hard thing.
Calculus and Chemistry are difficult, people in general are difficult, and when you're involved in 90% of your school's clubs and organizations, you get a bit overscheduled. My life's goal has become just keeping up: on homework and on this season of Modern Family. However, my goal is to blog more, so hopefully you will be hearing a bit more from me on this website.
And real quick, secret time. I love clothes and I like to think that I have a good sense of style. (Or at least, I'm good at judging other people's style heh) You guys wouldn't judge me too terribly if I started doing some outfit posts right? Okay, rock on.
So basically all I have to tell you guys today is that Junior Year is hard. It is a hard thing.
Calculus and Chemistry are difficult, people in general are difficult, and when you're involved in 90% of your school's clubs and organizations, you get a bit overscheduled. My life's goal has become just keeping up: on homework and on this season of Modern Family. However, my goal is to blog more, so hopefully you will be hearing a bit more from me on this website.
And real quick, secret time. I love clothes and I like to think that I have a good sense of style. (Or at least, I'm good at judging other people's style heh) You guys wouldn't judge me too terribly if I started doing some outfit posts right? Okay, rock on.
Sunday, November 10, 2013
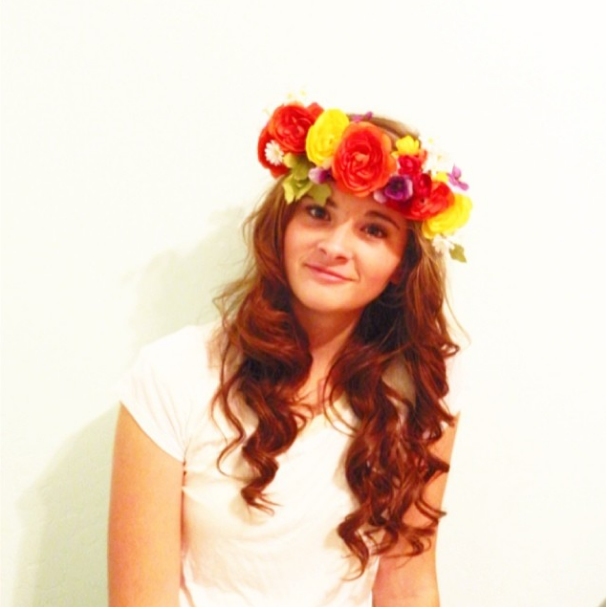
DIY Floral Crown
*Note: the following post satisfies a project requirement for Floral Design. Rock on.
MATERIALS:
Wire cutters
Scissors
Heavy wire (this will be used to make the headband base; I used 12 gauge)
Floral Tape
Silk Flowers (I got a variety of shapes, colors, and sizes; it just depends on your style of crown)
OPTIONAL:
Ornaments for crown (beads, feathers, etc.)
Wired wood picks
Stem wire (20 gauge or thinner; you could use wire as an alternative to floral tape)

I picked up all of my materials from Michael's, and ended up having most of everything left over at the end.
-
-
-


MATERIALS:
Wire cutters
Scissors
Heavy wire (this will be used to make the headband base; I used 12 gauge)
Floral Tape
Silk Flowers (I got a variety of shapes, colors, and sizes; it just depends on your style of crown)
OPTIONAL:
Ornaments for crown (beads, feathers, etc.)
Wired wood picks
Stem wire (20 gauge or thinner; you could use wire as an alternative to floral tape)

I picked up all of my materials from Michael's, and ended up having most of everything left over at the end.
-
-
-
Start by wrapping the heavy wire around your head and cutting it, leaving enough wire to wrap the ends together. The flowers at the end make it a little more snug, so make sure to leave room for that.


Next take your stems of flowers and cute them so the flowers are 4-5 inches long individually.

Take your longest-stemmed flowers (I chose these because I liked leaving the leaves on) and attach them to the wire with floral tape. Wrap tightly around the stem and wire, stopping a little bit before the flower head and avoiding the leaves.


Do this around the entire headband, until it's completely covered with floral tape.

If you have any smallish buds, you can combine them by wrapping floral tape around the multiple stems, forming a corsage-like bunch.

Attach these bunches and the big flowers to the crown in the same manner you did at the first. Make sure that all buds point toward the front of the crown.

If you want to add any other decorations to your crown (in this case a bird's nest), poke a wired wood pick through, and then use the wire to attach the item to the headband.


VOILA! Flower crown just like that. :)

Sunday, May 19, 2013
Subscribe to:
Posts (Atom)